BASEMENT DESIGN PROCESS & SPACE PLANNING PROTOCOL
Designing Your Basement Is Easier Than You Think
A Proven Design Process That Makes Every Project Easier
Whether you’re finishing a basement, remodeling your home, planning an addition, or redesigning an existing floor plan, every project begins with the same proven process.
Everything is completed remotely through email, allowing homeowners throughout the United States and Canada to work with our design team from the comfort of their home. Simply send the information you already have—such as measurements, sketches, builder’s plans, photographs, or notes—and we’ll guide you through the rest.
There’s no need to create a perfect drawing. A simple hand sketch with readable dimensions is usually all that’s needed to begin. Your information is then converted into an accurate CAD floor plan that serves as the foundation for your custom design.
The examples below illustrate each step of the design process so you’ll know exactly what to expect from the initial measurements through the completed design.
NOTE: Please don’t think contractors know how to design as well as I would if they offer this service to you. If they did, they’d be an Architect not a builder. My level of expertise is unmatched and I’ll send you over 250 references if requested that will tell you so just like the 80 Plus 5 star reviews at my Houzz page will mention.
Step 1 – Provide Information About Your Existing Space
Start With What You Already Have
The first step is providing basic information about your existing space so the design team can create an accurate starting point.
You can send whatever information is available, including:
- Existing builder’s plans
- Hand-drawn sketches
- Room measurements
- Photos of the existing space
- Notes about items you want to keep, remove, or change
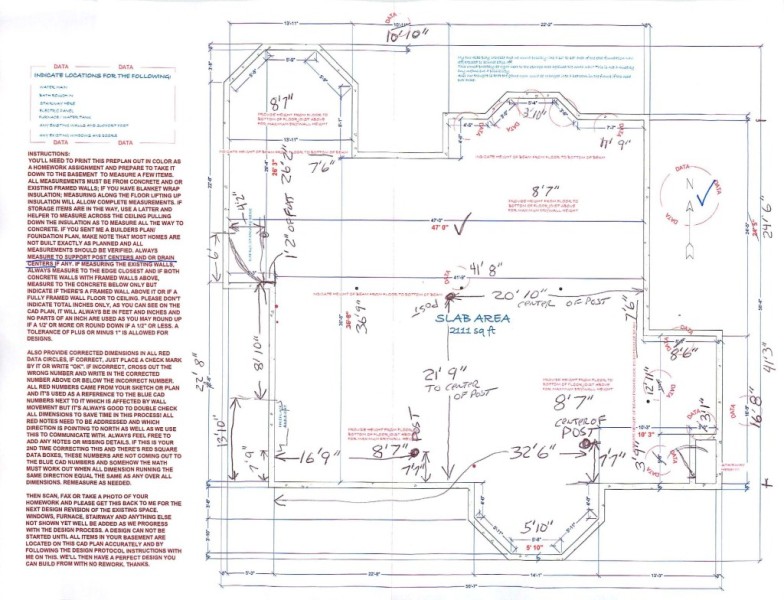
Your information does not need to be professionally drawn. A simple sketch with readable dimensions is usually enough to begin the process.
The goal at this stage is not to create the finished design. It is simply to document the existing conditions so an accurate CAD drawing can be created as the foundation for your project.
Helpful Tip:
Don’t spend hours trying to make your sketch perfect. Clear measurements and good photographs are usually much more valuable than a detailed drawing.
Our job is to convert your information into an accurate CAD drawing.

The upside down image above is what the client 1st sent via email to me as his plan or sketch showing me all dimensions. I flip it only attempting to make it fit my drawing template.
Step 2 – Creating the Existing Floor Plan
Turning Your Information Into an Accurate CAD Drawing
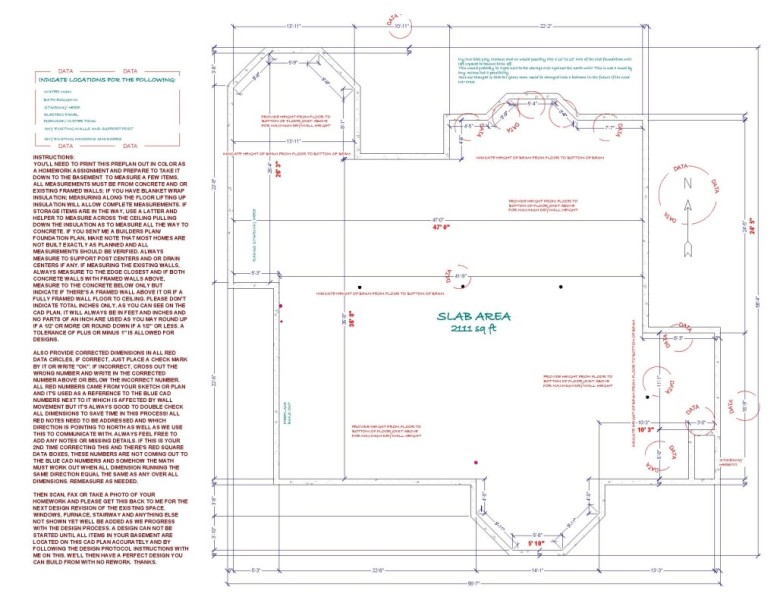
Once the measurements, sketches, photos, and other information have been received, the next step is creating an accurate CAD drawing of your existing space. We need this much done to provide your free quote for the design work. It verifies the configuration and size of the space to work in.
This first drawing represents the current conditions of your basement or living area before any design changes are made.
The purpose of this drawing is to create a reliable starting point. It documents important existing features such as:
- Exterior and interior walls
- Windows and doors
- Stair locations
- Ceiling, duct and beam heights
- Support posts and beams locations
- Mechanical equipment
- Plumbing locations
- Total Square Footage
- Other items that may affect the final design
This first drawing is called the Existing Footprint which becomes your homework project. It becomes the foundation for every design that follows.

Example: From Hand Sketch to CAD Floor Plan
The example above shows how information provided by a homeowner is transformed into a clean, accurate CAD drawing.
The initial sketch does not need to be perfect. The important information is having enough dimensions and details to accurately recreate the existing space.
Once this existing floor plan is completed, it becomes the foundation used to develop possible layouts and design concepts.
Step 3a – Review and Correct the Existing Floor Plan
Working Together to Verify the Details
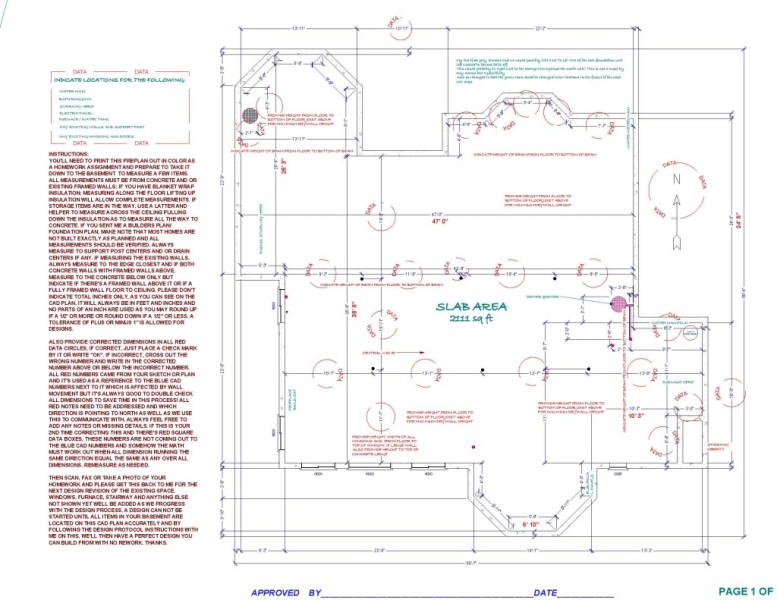
After the first CAD footprint is created, it is sent back for your review.
This step allows you to compare the drawing with your actual space and identify anything that may need to be corrected or clarified before the design process begins.
To make this simple, areas that need confirmation are highlighted with red circles and notes on the drawing.
You simply review the drawing, make any corrections, and email it back.
We continue this process until we’re confident that every important feature is accurately located, including:
- Walls
- Windows
- Doors
- Stairways
- Support posts
- HVAC equipment
- Plumbing
- Floor drains
- Structural beams
This collaborative review ensures your final design fits your home—not just a generic floor plan.

Example: Reviewing the Initial CAD Footprint
The example above shows how the first CAD drawing is reviewed. The marked areas identify items that need additional information, confirmation, or correction.
Simply review the notes, make any needed corrections, and return the updated information. This may include:
- Confirming measurements
- Adding missing dimensions
- Correcting wall locations
- Identifying doors, windows, or stairs
- Clarifying support posts, mechanical equipment, or other features
Step 3B – Reviewing the First CAD Footprint
Your Review Helps Ensure Accuracy
After the first CAD footprint is created, it is emailed back to you for review.
The drawing is compared to your actual space to confirm that all important details have been captured correctly. Any areas that need additional information or clarification are identified with red circles and notes.
You simply review the marked areas and provide the corrections or additional details needed.
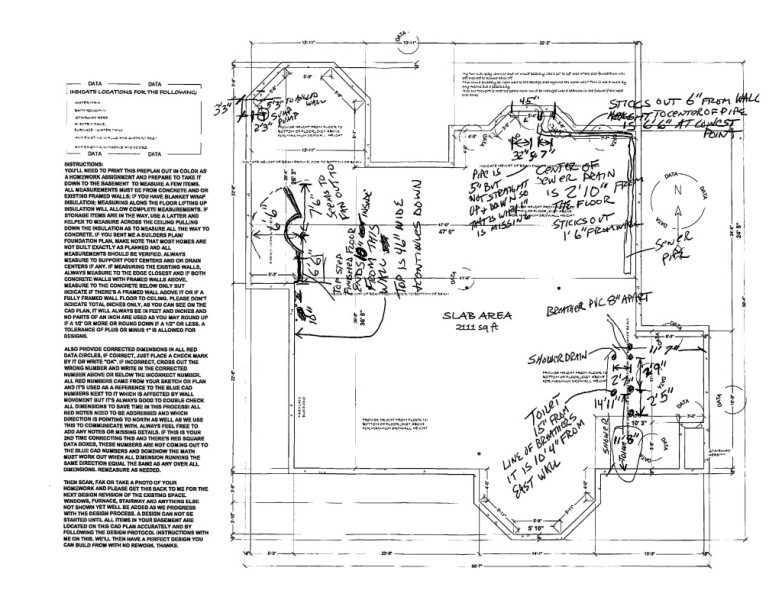
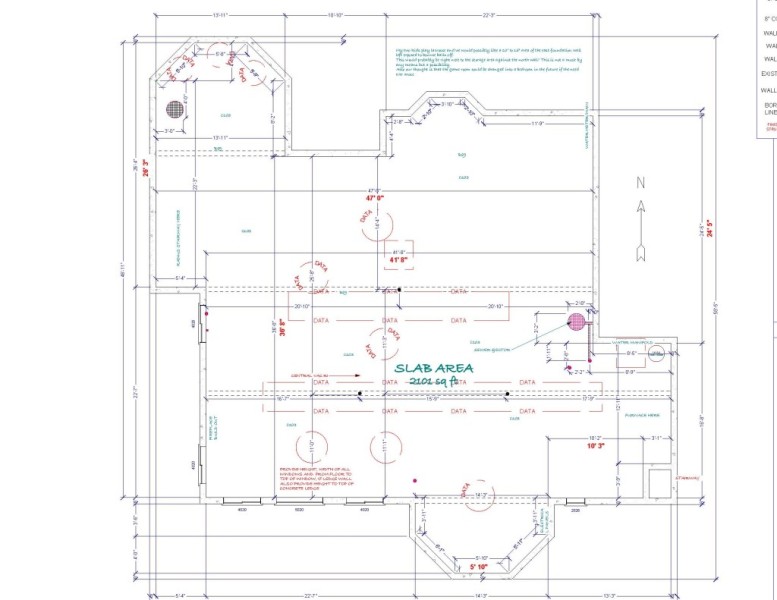
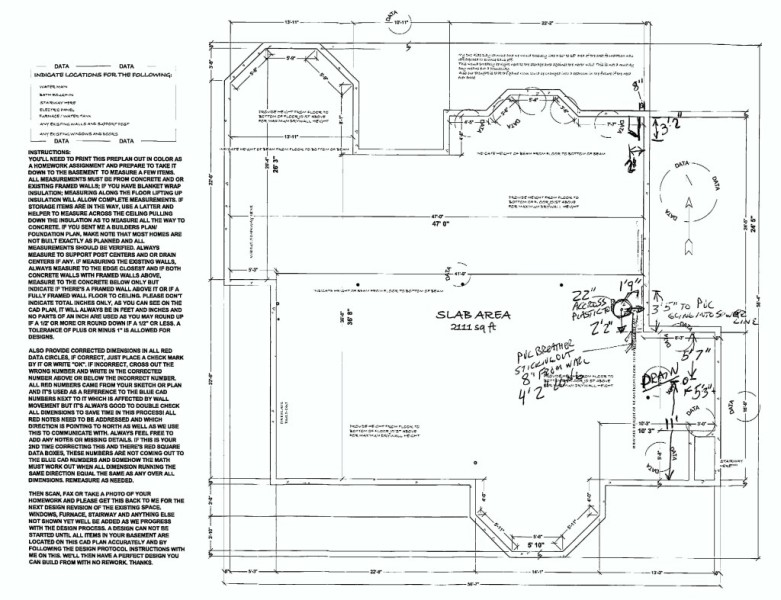
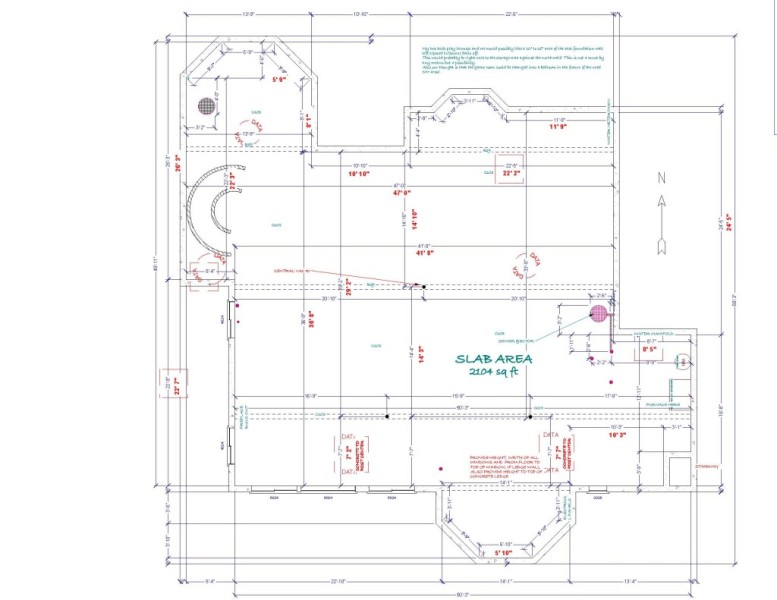

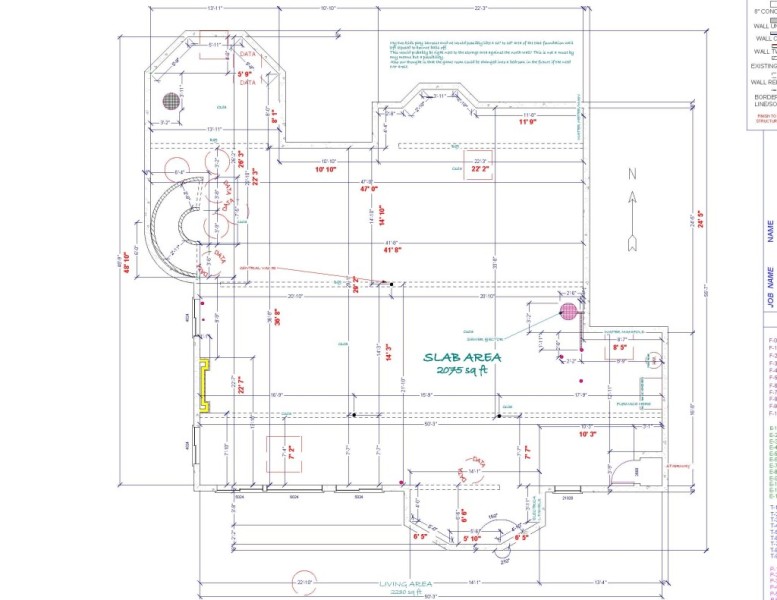

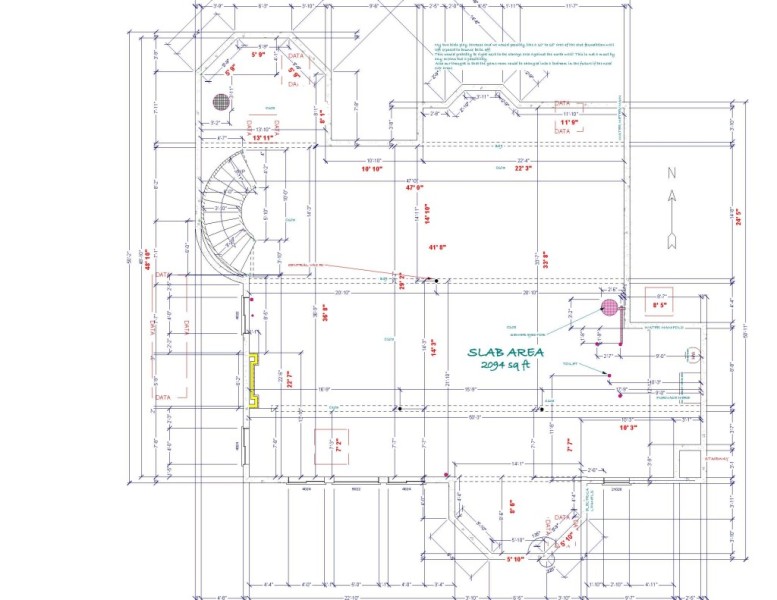

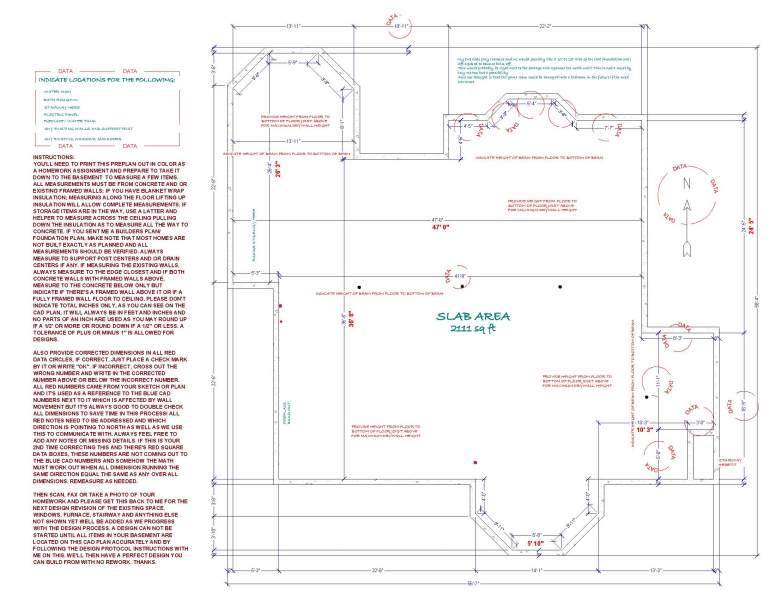
Typically it may only take a few times to correct the footprint. This example being from a real job, just took longer because it was a very large space. So keep in mind that larger basements and those with existing framed walls take a few times more than average also based on your measuring skills but no matter what, We’ll get the corrections if you follow this basement design process first developed in 2001 when the founder John Browning put up this web site. Once again, we send back and forth via emails these corrections needed on the plans named “Preplan Existing”. So you will see in the following below the first basement design process layout design. This shows how very important all items/objects fixed in the basement footprint made are needed to be located and within a tolerance of plus or minus an inch at the least.
Creating the Final Existing Floor Plan
Once the fee agreement is approved, signed and returned, the corrections have been reviewed and incorporated, the existing floor plan becomes the accurate foundation for developing your design options.
Having a verified starting point helps ensure that the proposed design fits the actual conditions of your home, including walls, stairs, windows, doors, support posts, mechanical equipment, and other important features.
Step 4 – Creating Your Custom Design Concepts
Turning Your Existing Floor Plan Into a Functional Design
Once the existing floor plan has been verified, the design process begins.
Using the accurate CAD footprint as the foundation, the wish list you sent in, different layout possibilities can be explored to create a space that fits your goals, lifestyle, and budget.
The design process focuses on making the best use of your available space while considering important factors such as:
- Room layout and flow
- Furniture placement
- Traffic patterns
- Storage opportunities
- Existing stairs, windows, and doors
- Mechanical equipment and structural limitations

Example: From Existing Space to Proposed Design
The examples above show how the verified existing floor plan is transformed into a custom design concept.
Rather than starting with a generic basement layout, each design is created specifically around your basement’s existing conditions and configuration. Then your wish list and the goals you want to accomplish.
During this phase, ideas can be explored and refined until the layout provides the best combination of appearance, function, and practicality.
So at this stage, you get to relax and sit back and see the first Preplan-1 is made (shown above) and it may not even be what the client had in mind because we’re well known for having clients think outside the box the first time around. We feel we’re being paid for the expertise, why not have fun and just show the client great use of space using expertise from many years of experience. In total, over 2500 basements professionally designed over the years providing the same design process. Overall, you’ll see in these following examples that we still ended up making it the way the client wanted since we promise a 100% satisfaction in this basement design process, even if we didn’t think the ideas were so great. It’s your home after all and we do aim to please. But we’ll will show a client why something won’t work as well.
Step 5 – Reviewing and Refining Your Design
Working Together to Create the Best Layout
After the initial design concept is completed, it is sent to you for review.
This is where your ideas, preferences, and feedback become part of the final design. You can review the layout, ask questions, and request changes that will help make the space work better for your needs.
Changes may include:
- Adjusting room sizes
- Moving walls or openings
- Changing room locations
- Improving traffic flow
- Adding storage or special features
- Modifying the design to better fit your lifestyle
Always and at any time of this basement design process; you can send me example images of what appeals to you from other web sources so we know what is on your mind for looks. Our main job is to make the best use of space and get everything located to fit into your existing structure and show how it will be built. Also to create an appealing overall flow and functionality to the space.
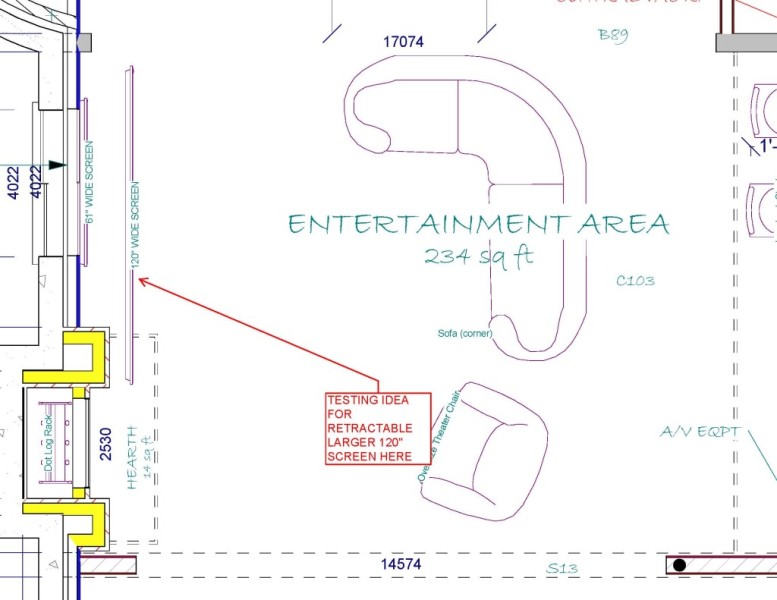
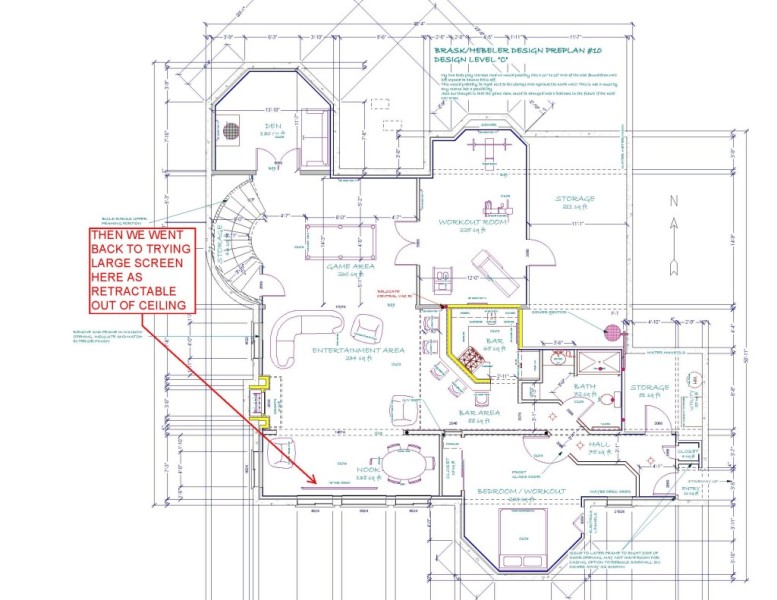
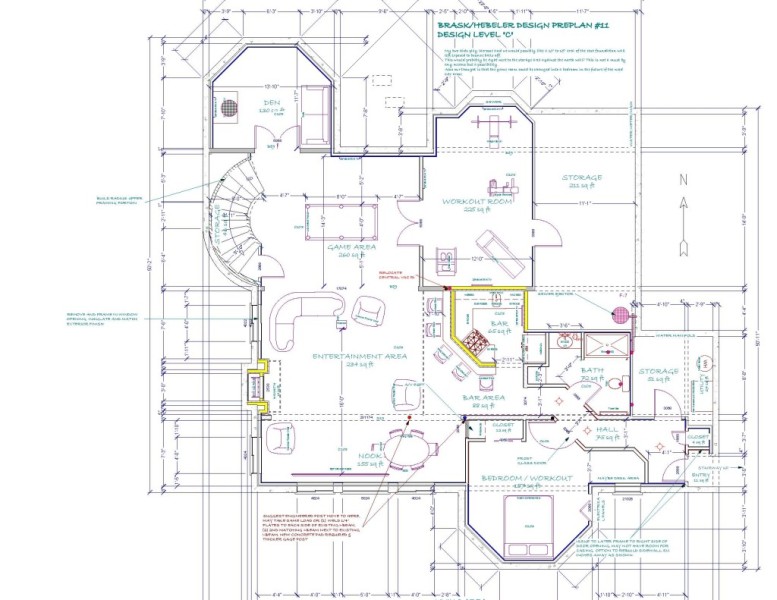
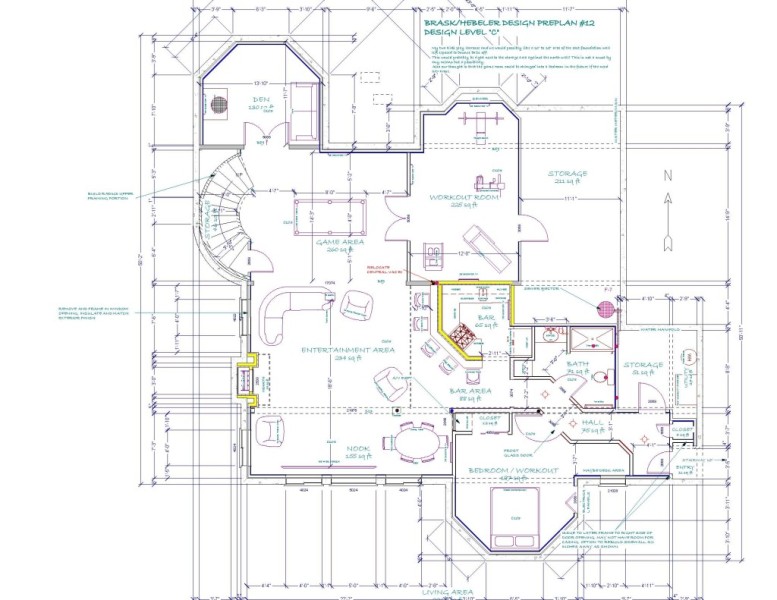
Not to make too much more for you to read, the following gallery shows all Preplans sent to and received back from client progressively made for this client. So you can see all his choices before I polished off the one he picked. You may or may not notice each change by the way. We tried many locations but in the final views in this large gallery, you’ll see not just what we tried but how the final plan 12 ended up looking as well. Please allow time for these to load in your browser!

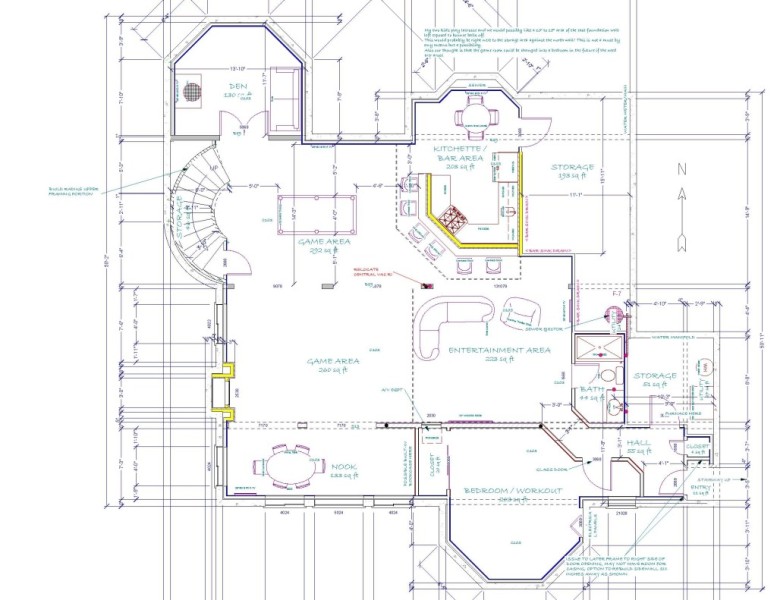
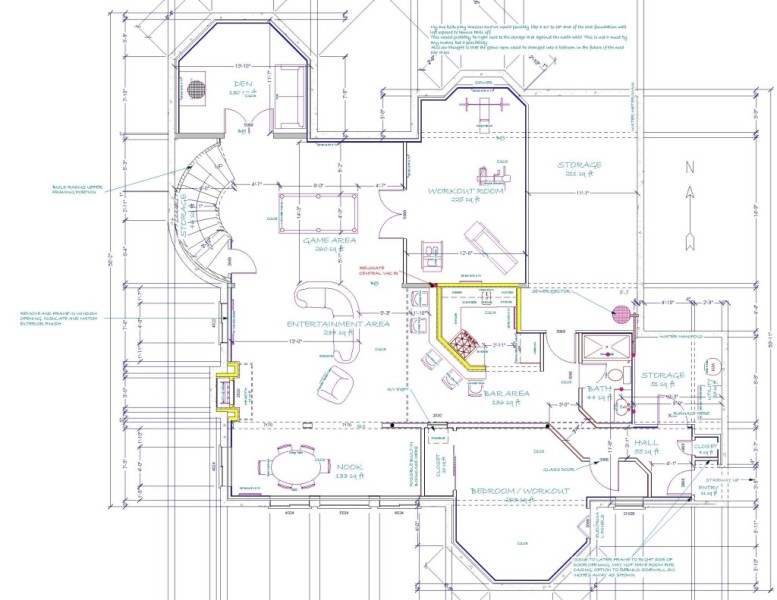



The next phase is to add in all the electrical, lighting and ceiling design using soffits. See Ceiling Soffit Types – Basement Designer to learn more about what a soffit is and what it can do for the design. Being masters of optical illusions, using these soffits and many other tricks to hide beams, pipes, ducts and to take your eyes off of them. This depends on the design level you choose from a link sent to you.
After the client indicates in an email back to me for my records that we are all done with the design and no more changes are required. We polish off the plan with great detail. It’s made in a PDF format file to print out on 24X36 inch paper to a 1/4″ per foot scale for getting quotes, permits and for building it without costly rework due to good planning and my expertise of course. All completed to the current IRC codes.
Step 6 – Receiving Your Completed Design Plans
Detailed Plans Ready for Your Next Step
Once the design has been finalized, the completed plans are prepared and provided to you in a format that can be used for planning, estimating, permitting, and construction purposes.
Your final design package provides a clear visual guide showing how your finished space can be created.
Depending on the project, completed plans may include:
- Existing floor plan documentation
- Proposed floor plan layouts
- Room dimensions and locations
- Wall, door, and opening locations
- Stair and mechanical considerations
- Additional details needed to understand the design

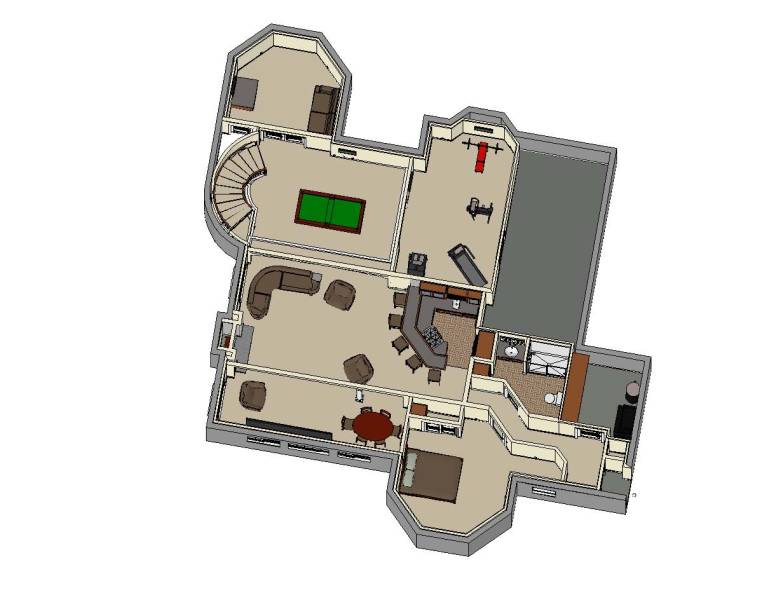
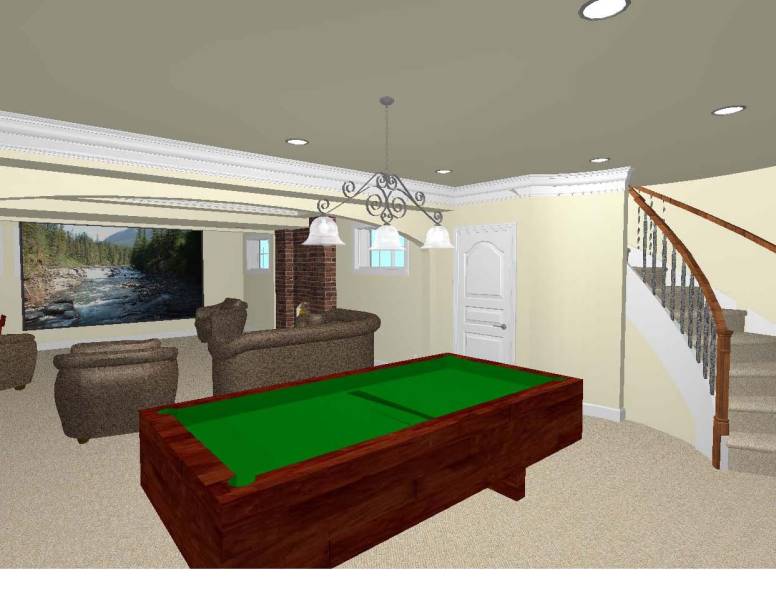
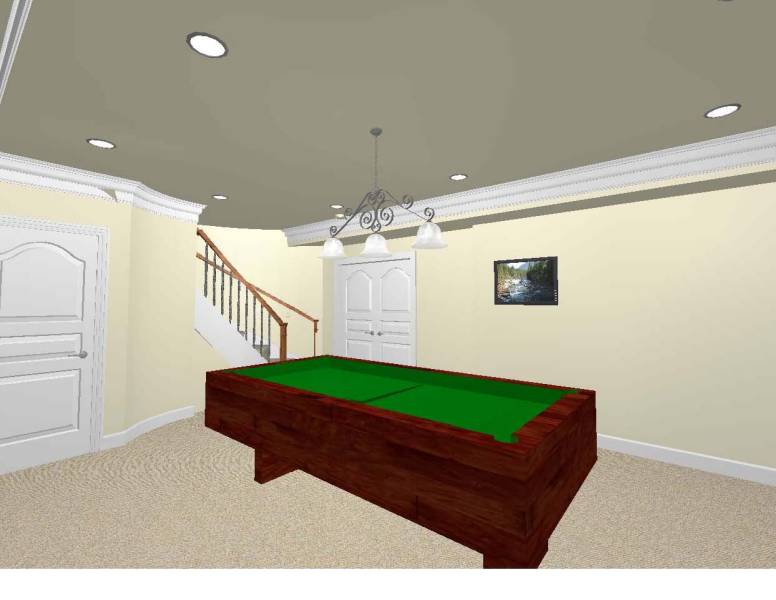
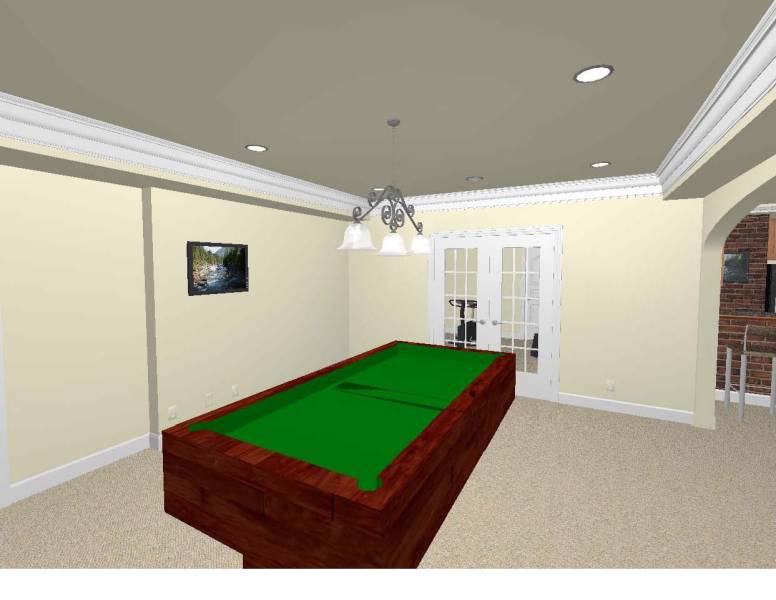
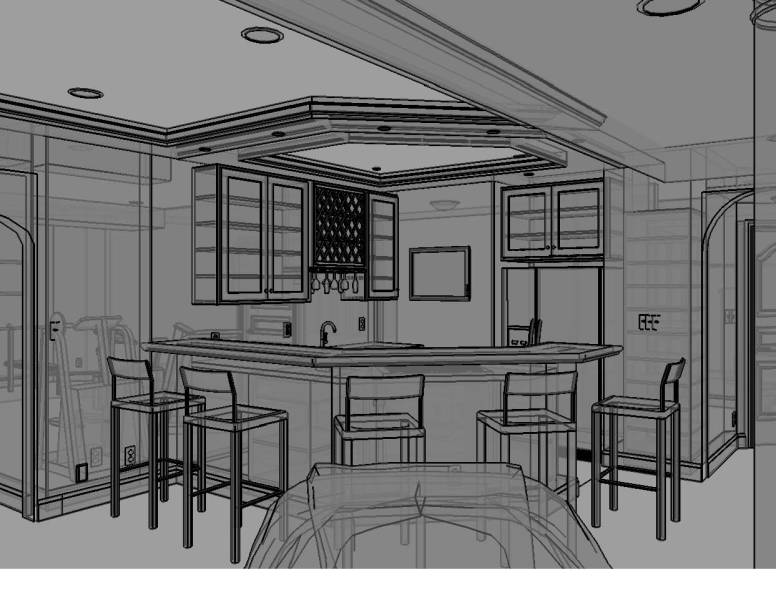
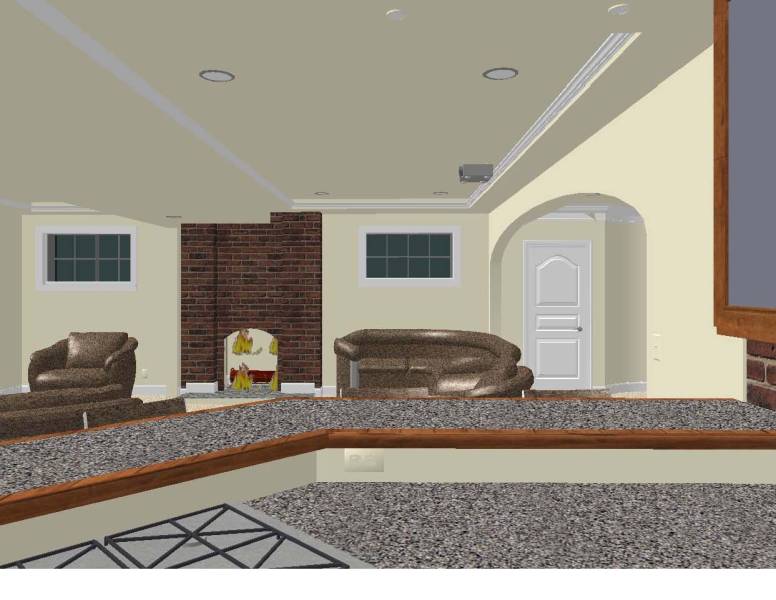
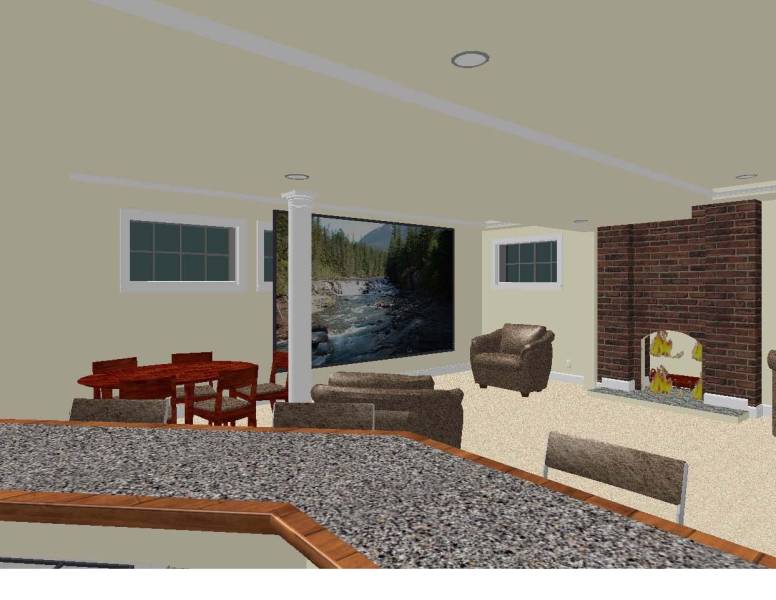
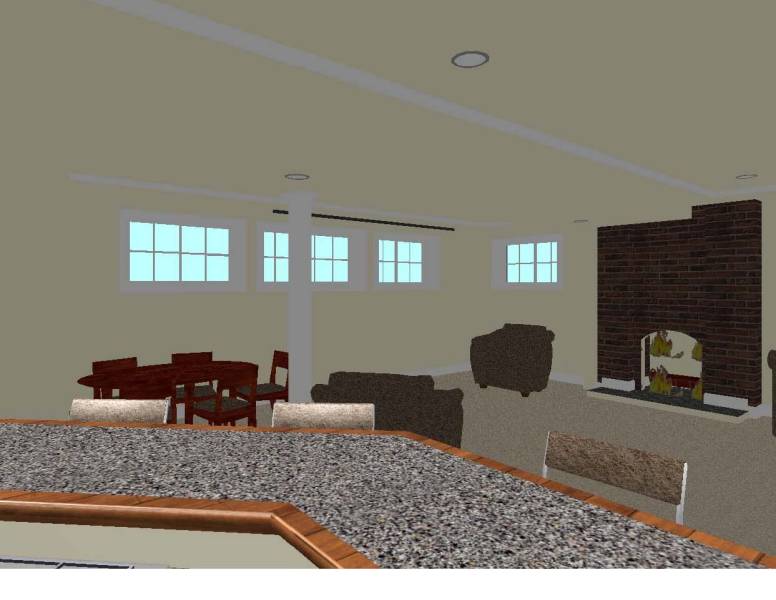
The following gallery is this final master plan in design level “D” with all views that I send the client and to show you what I put in the final portfolio upon completion of the plan and even then, minor changes can still be made. I’m always here for you even after you start building this beautiful yet professional basement design. We can work at your pace no matter how long you wish to do this or how fast, all for one low cost. Plans turn out better the more time we have to think. So if all this sounds fun and easy, let’s get going and get all your information to me if that’s what’s holding us up from starting. To contact me and upload files all at the same time, use Contact Me or better yet, use a cloud service like iCloud, Google Drive, dropbox or onedrive and merely email me the share link to your images or documents each time as needed.




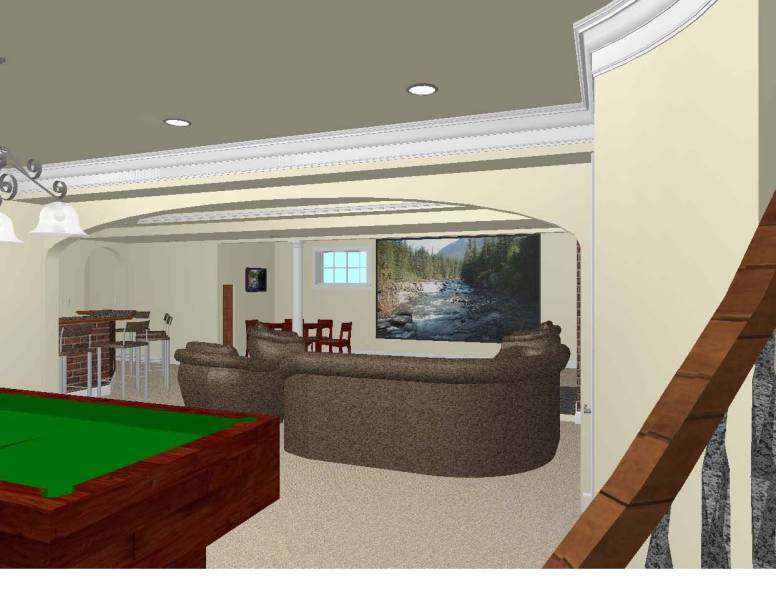


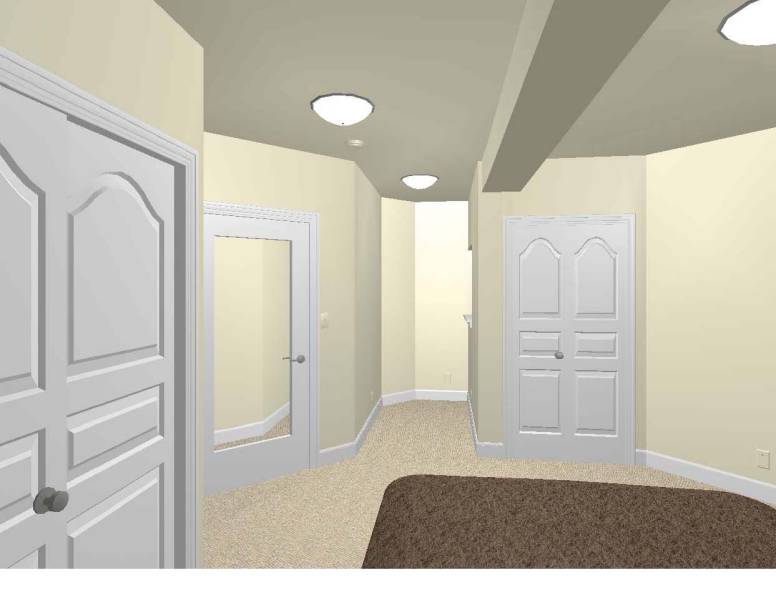

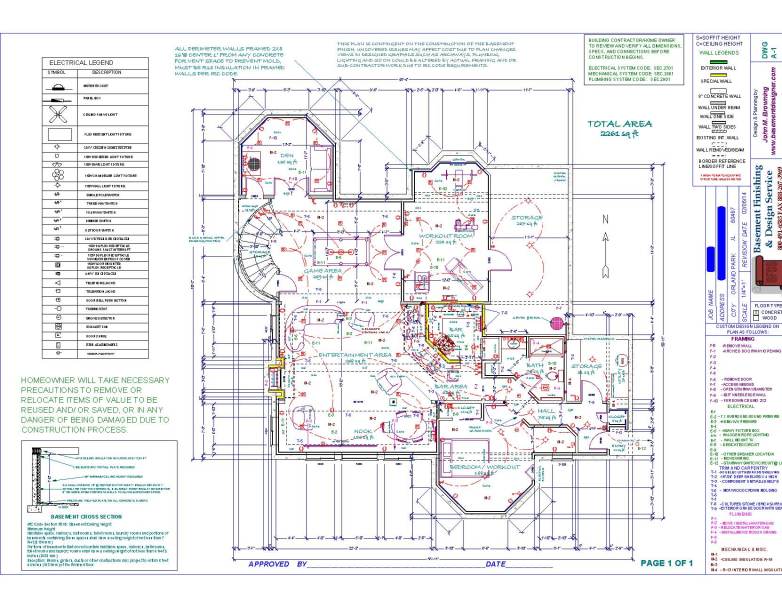
Example: Completed Design Plans
The examples above show the type of detailed drawings created during the design process.
These plans help homeowners clearly communicate their ideas with contractors and provide a visual reference before construction begins.
A well-developed design helps reduce uncertainty, avoid costly changes, and allows everyone involved to better understand the project before work begins.
Why a Detailed Design Process Matters
A Better Plan Before Construction Begins
A successful remodeling project starts with a well-thought-out design.
Taking the time to accurately document the existing space, explore different layout options, and refine the final design helps identify potential problems before construction begins.
A detailed design can help you:
- Better understand what is possible in your space
- Compare different layout options
- Make informed decisions before construction starts
- Communicate your ideas clearly with contractors
- Reduce unexpected changes and costly mistakes
- Create a finished space that works the way you planned
Every home has unique challenges. Existing walls, support posts, stairs, windows, plumbing, and mechanical systems all affect what can be done.
A professional design process helps turn those challenges into opportunities by creating a plan that works with your home’s existing conditions.
From Concept to Completed Space
The purpose of the design process is simple:
Create a clear plan before construction begins.
Whether you are finishing a basement, remodeling an existing home, planning an addition, or improving an outdated floor plan, a well-developed design gives you the confidence to move forward.
I do hope this helps explain my basement design & space planning process protocol and remember, there’s no additional cost if we can do this my way. You have to admit, it’s a cool protocol and fun process seeing what is possible at first before we polish off a plan. Then without a doubt you will be 100% pleased, guaranteed.
To contact me and to share a file, use Contact Me. Or upload to a cloud drive and share the link with me or merely email files to me at [email protected].
Need to know more about my services? Click “How It Works” and or “Concept Design Service”
Want to know about other “Basement Topics” listed.